Perfectionist Auto Sound and Security

Alaska's Most Award Winning Auto Customizer

  • About Us
    • Why Choose Us
    • Meet Our Team
    • Our Awards
    • Virtual Tour
    • Community Engagement
  • Signature Products
    • DroneMobile
    • SoundShield®
  • Services
    • Remote Car Starters
      • Vehicle Security
    • Car Audio
      • Sound Deadening
    • Custom Fabrication
    • Driver Safety
      • Bluetooth
      • Blind Spot Safety Systems
      • Camera Systems
      • Navigation Systems
    • Laser And Radar Detectors
    • Lighting
    • Offroad and Marine
      • Motorcycle Audio
    • Custom Interiors
    • Performance
      • Tires and Wheels
      • Suspensions / Lift & Lower
    • PRO Commercial Division
  • Gallery
    • Photos
    • Videos
    • Wallpaper Downloads
  • Contact Us
    • FAQ
    • Feedback
    • Join Our Team

Car Audio System Setup

09/03/2017 By John Schwartz

System SetupIt may seem as if they should be similar processes, but installing a new source unit, amplifiers and speakers in a car is unlike installing most home audio systems. It is not as simple as plugging things in and hoping they work. Proper integration of your new electronics into modern vehicles and their wiring is getting more and more complicated as complex factory sound systems become more involved. One thing that hasn’t changed, though, is the need to configure the equipment you have selected. Your installer will include this setup time in the cost to install your system. What does system setup and configuration involve? Read on to find out.

Signal-level Adjustments

System SetupWhen it comes to adding an amplifier to your vehicle, the most significant adjustment your installer will make is to adjust the amplifier’s sensitivity or gain control. Amplifiers have these controls so they can be compatible with a variety of different source units with different maximum output voltages.

Amplifiers are relatively simple devices in concept. They take an audio signal from your source unit and increase its voltage so it can drive a speaker. A 100 watt amplifier has to be able to increase a 1 volt signal more than a 4 volt signal to reach the 20 volts required to produce 100 watts into a 4 ohm speaker. The gain or sensitivity control lets us adjust for almost any source unit voltage.

Why Sensitivity Adjustments are Important

If the sensitivity of the amplifier is set too low, you will not be able to get the full power of your amplifier. If it is set too high, then you can drive the amplifier into distortion quite quickly. Too much “gain” can also add noise to the system in the form of hiss. A little extra is OK to allow quiet recordings to be played loudly, but too much is a surefire sign that whoever set up the system did not fully understand gain structure.

System Setup Tools

System Setup
The SMD DD1+ allows for precision gain structure setup.

Different shops use different techniques to set gains on amplifiers. Some use an oscilloscope along with a set of test tones. Others use distortion detection devices like the SMD DD-1 or DD-1+. Finally, some installers are quite adept at setting up systems by ear, but that comes with years and years of experience.

As long as the system plays loudly without significant noise or distortion, the settings can be considered correct. If the system runs out of power at half-volume, then it needs some more adjustments.

Crossover Adjustments

There are two main advantages of adding a subwoofer to an audio system. A subwoofer provides more bass output than a typical set of door speakers could ever hope to produce. The secondary benefit is to relieve the small speakers of their requirement to try to produce bass. This reduction in bass reduces the distance the speaker cones have to move and directly reduces the potential for distortion. Midrange frequencies can be reproduced with improved clarity and at higher levels.

Tying this back to system tuning, how we set the crossovers built into your amplifier is crucial to ensuring that the output of your system blends perfectly between the midrange speakers and the subwoofer. If the crossover points overlap, there can be too much midbass, and the system will sound boomy or “honky.” If the crossover points underlap, the system probably won’t have enough midbass and will sound very dry and flat; the subwoofer can also sound “separated” from the system, reducing the coherence and realism of your music.

Speaker Polarity Adjustments
System Setup
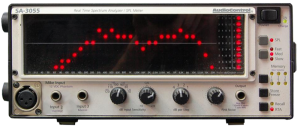
A dip in response at the crossover point can indicate a polarity problem.

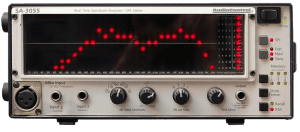
Because each vehicle is different, sometimes the direction a speaker faces requires that we wire it in reverse polarity for the output to combine properly from an acoustical standpoint. This requirement is very common with subwoofers, since they are often pointed in the opposite direction from the smaller interior speakers. Properly trained and equipped installers know how to measure the frequency response of a system and correct for that. In most cases, an audio analyzer is the best choice for setting up a system. These can be stand-alone units from companies like AudioControl and NTI or software-based solutions that work with a laptop, netbook or tablet.

Left-to-right speaker polarity, and the polarity between midrange drivers and tweeters, depends on placement and crossover slopes. These regions deserve analysis before a car leaves the install bay.

Leave It to the Experts

A properly tuned sound system will play louder, last longer and be much more enjoyable to listen to. As you can see from even from this overview, the tools and training required to maximize the performance of even a simple mobile sound system can be expensive and complicated. The staff at your local mobile enhancement retailer should be familiar with these processes and employ them on each installation they perform. Confirming this is part of your process in selecting a retailer that is qualified to work on your vehicle.

This article is written and produced by the team at www.BestCarAudio.com. Reproduction or use of any kind is prohibited without the express written permission of 1sixty8 media.
Filed Under: ARTICLES, Car Audio, Integration

Product Spotlight: Maestro F150 Kit

08/08/2017 By John Schwartz

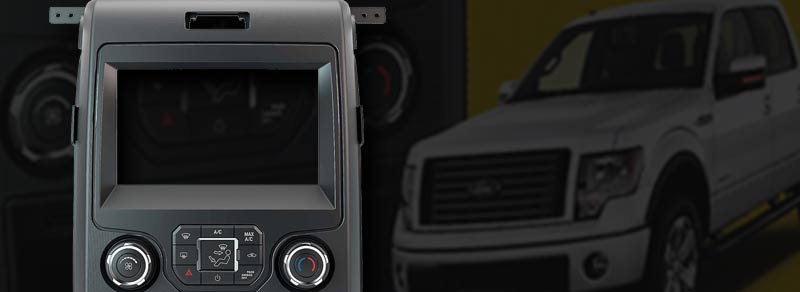
Maestro F150 KitAt Perfectionist Auto Sound and Security in Anchorage, we offer our clients the latest in cutting-edge technology for your vehicle. Some factory systems have made integrating a new upgraded head unit challenging, but thanks to companies like iDataLink and their Maestro F150 kit, we can offer you a clean upgrade for your 2013-up Ford F150 truck.

Maestro F150 Kit

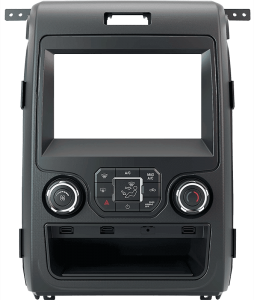
Maestro F150 KitThe 2013 and up Ford F150 with the 4.3” “My Ford Touch” factory radio and climate control system does not allow for a direct replacement of the radio. The engineers at iDataLink have solved that problem with a well-designed installation kit that provides mounting for a single or double DIN head unit.  It moves the climate control system, and provides a storage pocket with ports that allow easy access to some of the features that may be on your new radio like USB, HDMI, or audio ports.

Keep that Factory Look

The kit has a new center dash panel that perfectly matches the cosmetics of the Ford interior. The climate control system connects to a new central heater/AC control unit that keeps the factory look but moves it to a location that allows for a double DIN opening for your new radio. The new radio is centered in the kit for easy access. With your new reconfigured center console, we are free to upgrade you to the latest technology and features that you want for your truck.

Keep the Factory Functions

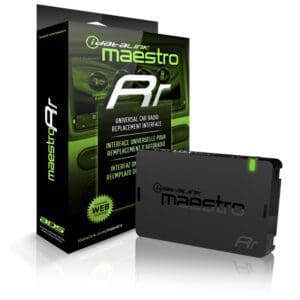
Maestro F150 KitWith the addition of the iDataLink Maestro RR and a new compatible head unit, you will not only get to keep the steering wheel controls, but you will also be able to connect to voice, phone, media, back-up cameras, and other vehicle information such as additional gauges and vehicle performance indicators. You will not have to sacrifice anything that you like about the factory system to do a major upgrade.

Here at Perfectionist Auto Sound and Security, we can tackle any challenge.  Our Ford F150 upgrade with the iDataLink Maestro F150 kit is just one example. Come on by and let us show you the other options we have for your truck- or any other vehicle you own! Click here for more information.

Filed Under: Car Audio, Integration, PRODUCTS Tagged With: idatalink, Maestro

Fuses: To Serve and Protect!

05/21/2017 By BestCarAudio.com

FusesLet’s face it: Accidents happen. Minimizing the collateral damage from an accident is important. When you have a mobile electronics system that includes installing an amplifier in your vehicle, a discussion about fuses or circuit protection should take place before the installation begins. Choosing the right device to ensure your system works as intended and is safe in the event something goes wrong is very important. Let’s talk about fuses.

What is a Fuse?

A fuse is a device that will disconnect a circuit when too much current passes through it. Fuses typically incorporate a small piece of metal with a specific amount of resistance. As current passes through the fuse, the piece of metal heats up. Up to a certain temperature, the circuit remains functional. If the current level increases, the fuse heats up more and will eventually fail, which protects the power source and load.

My Wire Needs a Fuse?

FusesTwo common locations in our audio systems need protection. Any power connection to the battery needs a fuse. Any electronic device connected to the vehicle electrical system should also have a fuse.

The fuse at the battery is there to protect the vehicle in the event of a short circuit. If it is installed incorrectly, the power wire may rub against a sharp object and wear through the jacket. Once the conductor touches the chassis, a short circuit will occur. Left unprotected, the only limiting factors in how much current passes is the internal resistance of the battery, the resistance of the power wire and the resistance of the connection to the chassis. In most cases, hundreds of amps of current will flow – if we don’t have a fuse on the battery.

Imagine a car with a big stereo system. There may be an upgraded AGM battery under the hood and a few huge amplifiers in the trunk. What if the unthinkable happens – the car is involved in an accident, and the chassis shorts to the power wire? Without a fuse on the power wire connection to the battery, both the wire and the battery will heat up very quickly and could easily start a fire.

Fuses in Our Devices

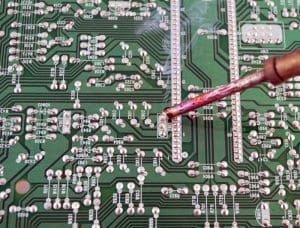
FusesRecently, we experienced an instance where a radio was blowing the 15 amp fuse in its power harness as soon as it was plugged in. Even with all the speakers disconnected, it kept blowing fuses. It turned out there was an improperly soldered terminal on the internal amplifier in the radio. This poorly soldered connection was shorting the power connection to the chassis of the radio and, subsequently, to the ground. The 15 amp fuse in the harness prevented the copper traces on the circuit board from being destroyed. Our technician was able to clean up the solder connection, and we put the radio back into service.

Types of Fuses in Car Audio

More and more new fuses are introduced to automobiles each year as manufacturers strive to reduce weight and packaging sizes. On the aftermarket side, we use three common fuse styles.

AGC and AGU Fuses

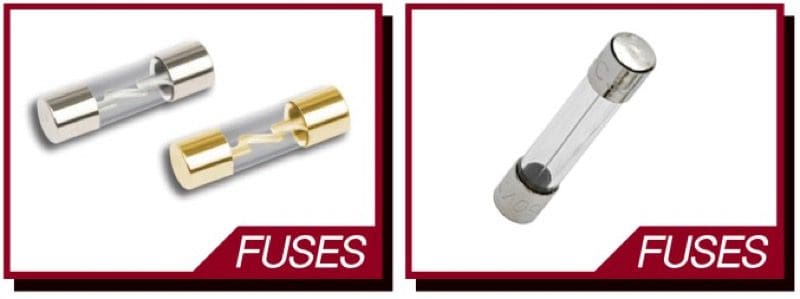
FusesAGC and AGU fuses are constructed from four components: a fusible link, a pair of end caps and a glass tube. The manufacturer solders the fusible link to one end cap, then slides the glass tube over the link before soldering on the other end cap. Many radio harnesses and lower-power devices use AGC fuses. For years, the larger-diameter AGU fuses were very popular in amplifier installation kits.

The problem with these fuses is that the quality and reliability of the internal solder connections can affect their performance. We have seen brand-new fuses out of package not work because the solder connection on one cap was incomplete.

Another consideration for AGC and AGU glass fuses is how we connect them to our power wire. In most cases, a terminal is pressed against the end cap using a sprung metal connection. As this connection heats up, it can loosen. For low-current applications, AGC fuses are acceptable. For moderate- to high-current applications, there are better alternatives.

ATC, ATM and Maxi Fuses

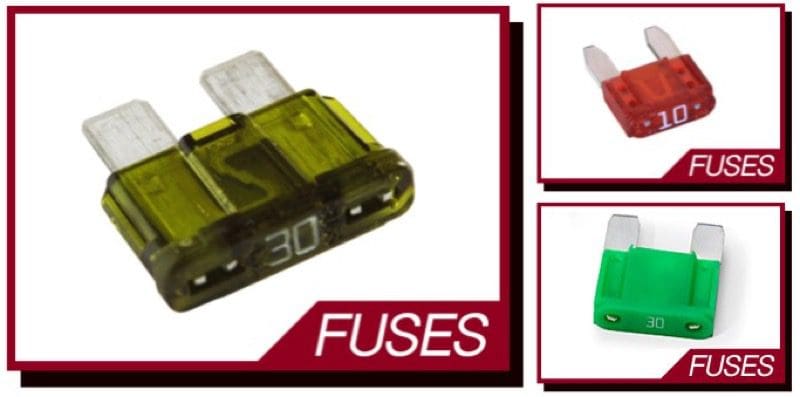
FusesThis style of fuse is composed of two components: a plastic housing and a stamped metal piece that includes the electrical connection tabs and current-limiting link. These fuses are compact and easy to install. They eliminate the connection that plagues the glass fuses, but they still suffer from problems when it comes to connecting them to the power wire. In almost all applications, sprung metal tabs are responsible for pressing the tabs of the fuse against the wire terminals. These can fail over time.

A common point of failure is the loop-type under-hood fuse holder that are included with aftermarket lighting kits. These molded holders include two female terminals connected to the input and output wire. After time and many heat cycles, these terminals can loosen, and the resulting resistance will cause the holder to fail. It should be noted that the current required to heat up the connection to the failing point is often less than what is required to blow a fuse.

ANL and Mini-ANL Fuses

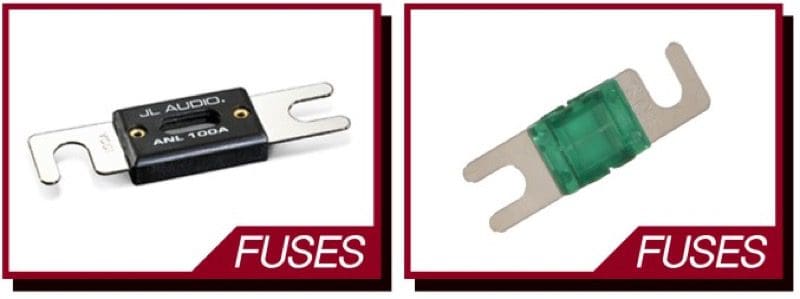
FusesIn the mobile electronics industry, ANL and Mini-ANL fuses are the preferred option when it comes to protecting devices from over-current conditions. These fuses are constructed in the same way as an ATC, ATM or maxi fuse, with a single metal plate that is stamped to provide the connection terminals and the fusible link. A plastic housing snaps over or rivets to the device to enclose the link.

Where these fuses differ from the other two styles is in how they are connected to the wiring. A set of large blocks connects to the wire. Most of these blocks use set screws. The fuse is then attached to these blocks with a large-diameter bolt. Your installer can (and should) tighten the bolt to ensure that the electrical connection is solid and secure.

Protect Your Vehicle and Equipment

Whenever you have your installer adds an electrical device to your vehicle, it must be fused. Even a small-diameter wire for an auxiliary USB charge port, a radar detector or LED lighting can cause an impressive amount of damage when overheated. It will not only melt through its jacket, but will melt the wiring around it. Proper circuit protection is cheap insurance against having to call the insurance company. Your local mobile electronics specialist retailer would be more than happy to discuss how and where they fuse the equipment they install.

This article is written and produced by the team at www.BestCarAudio.com. Reproduction or use of any kind is prohibited without the express written permission of 1sixty8 media.
Filed Under: ARTICLES, Car Audio, Integration, RESOURCE LIBRARY

Steering Wheel Audio Control Integration

05/14/2017 By BestCarAudio.com

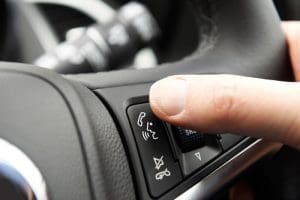
Steering Wheel Audio ControlWhen you go shopping for a new radio for your car, one of the many questions the product specialist should ask you is whether your existing radio has steering wheel-mounted audio controls. Almost every aftermarket radio has provisions to accept a signal that will give you steering wheel audio control functions like volume, source selection, tracking and power. Here’s how it all works.

Factory Control Functionality

Steering Wheel Audio ControlThere are two common types of steering wheel control interfaces. The first is resistive; the second is data. Systems that use resistors often have two wires connected to the switches. Each switch presents a different resistance value when pressed. The factory radio sees these different resistances as different voltages and the computer in the radio responds appropriately. There are usually two wires so a multitude of switches can have well-separated resistance values to ensure functions will never overlap.

A small computer is built into the steering wheel controls switches in vehicles that use data communication for the steering wheel audio controls. This computer has inputs dedicated to each switch and its function. When you press a switch on the steering wheel, the computer sends a digital communication to the computer in the radio. Often, this communication takes place on the vehicle’s CAN data network.

Connection to Aftermarket Radios

Steering Wheel Audio ControlIn North America, almost every radio is Steering Wheel Remote Control Ready. Being “Ready” means the radio has a connection on the back to accept a serial data communication signal. The communication language used on the radio connection is not the same as that used in the vehicle. Thus, you will require an interface module to make everything work. Companies like iDatalink, Axxess and Pacific Accessory Corporation (known in the industry as PAC) all offer interfaces that can be programmed to understand and translate the information from the vehicle to something that is compatible with your radio.

Steering Wheel Audio Control Installation

Steering Wheel Audio ControlWhen your tech is installing the new radio in your vehicle, he has three tasks to complete to make the steering wheel audio controls work. First, he must wire the controls into your vehicle. In many cases, the installer will use a “harness saver” or “wire harness adapter” to connect a set of bare wires to the factory radio plug for power, illumination and speaker wire connections. This adapter usually includes the steering wheel communication wires from the vehicle.

Once the installer completes the electrical connections, the next step is to program the module to understand the commands from the vehicle. Some interfaces have software built into them to recognize commands from the vehicle automatically.

Another method of programming the interfaces uses a website that will allow the installer to select the year, make, model and trim level of the vehicle, and program the interface to recognize the correct commands.

Finally, the interface has to be programmed to send the correct commands to the new radio. Each brand of radio has a set of dedicated and unique command codes.

Additional Options

Steering Wheel Audio ControlOver the past few years, many vehicle owners have chosen to upgrade their factory radios to add Bluetooth audio streaming and hands-free calling to their vehicle. New cars have telephone control buttons on the steering wheel, but older ones don’t. Several of the interface modules have the ability to send different commands to the aftermarket radio, depending on how long you press and hold the steering wheel buttons. For example, a quick tap on the Volume Down button will, of course, turn the volume of the aftermarket radio down. You can have the button programmed so pressing and holding it for a couple of seconds to tell the radio to answer an incoming Bluetooth phone call.

The list of compatible functions varies by vehicle and the make and model of the aftermarket radio.

Custom Applications

Steering Wheel Audio ControlOne unique feature of the steering wheel control interface is that your installer could build a set of custom controls for you. Let’s say you are building a custom car, and you want to add a nice sound system. In most applications like this, the builder will install the aftermarket radio in the glovebox, under the seat or in the trunk of the vehicle. But how can you control the radio if you cannot reach the controls? Your installer could mount a set of switches in the center console and then program the switches, through an interface module to control the aftermarket radio.

Some installers and fabricators have gotten quite creative with these switch installations. A power mirror adjustment switch, for instance, serves as a great solution for volume and tracking functions.

Your Retailer is Ready to Help

When it is time to install a new radio in your vehicle, drop by your local mobile electronics specialist retailer. They would be happy to show you the latest in car audio source units and explain how they can integrate it into your vehicle.

This article is written and produced by the team at www.BestCarAudio.com. Reproduction or use of any kind is prohibited without the express written permission of 1sixty8 media.

Filed Under: ARTICLES, Car Audio, Integration, RESOURCE LIBRARY

Basics of OEM Integration in Your Newer Vehicle

04/09/2017 By BestCarAudio.com

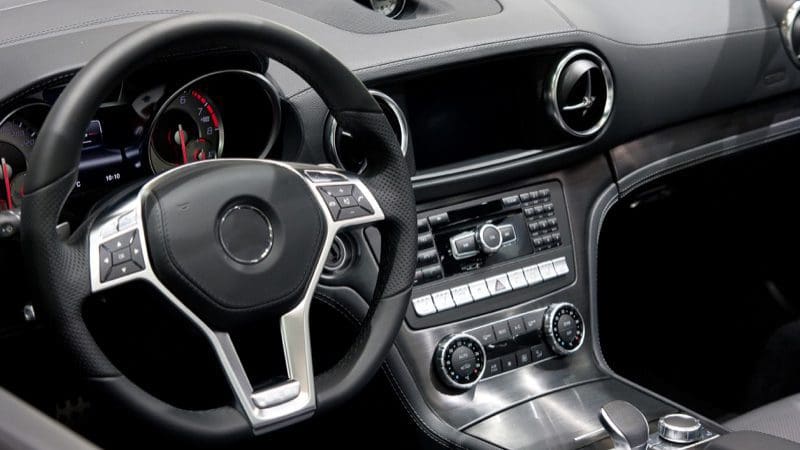
OEM IntegrationInstalling a mobile audio system involves much more than just hooking up some wires and driving in a few screws. Almost all vehicle manufacturers have realized that some amount of audio system tuning will dramatically improve their customers’ experience. When you decide it’s time to upgrade your factory audio system, we need to take into account any tuning that may have been done by the factory. It’s not easy, but at the same time, it’s not impossible. This article provides a brief look at what is involved in connecting a new amplifier and speakers to your factory source unit or amplifier, or as it is called, OEM integration.

It’s Not Flat

No, we aren’t talking about the Earth. One of the first steps in designing a premium audio system upgrade is to measure the electrical signal that is being sent to each of your speakers. Why? As we mentioned, more and more factory source units and amplifiers include advanced signal processing. Even some of the most basic audio systems with only four speakers have custom equalization for each speaker. Once our installers know what they are dealing with, they use that information in designing your new system.

OEM IntegrationThe signal measurement process should be done before system design. If the signal is flat (no equalization), then the system design may take a different direction from when the signal is equalized. Compensating for factory equalization requires that some kind of equalizer be installed in the new system. Either way, we have to allot time to measure the acoustical response of the new system and make appropriate adjustments.

Think of this process as though your installer were a surgeon preparing to solve a medical problem for you. The surgeon will order x-rays, scans and many tests long before you’re on the operating table. Nobody wants to start work on a project without knowing what they are dealing with. Modern car audio systems are no different.

Front and Center

OEM IntegrationAutomobile manufacturers strive to make all their customers happy – within a certain budget. This goal includes providing an enjoyable audio experience for everyone in the vehicle. Many mid- and high-level factory audio systems use a center channel to help create a listening experience that is enjoyable for both occupants of the front seats. Configured properly, a center channel can help create a realistic soundstage from both seating positions. Trust us when we say that some of the people who tune these factory audio systems have a lot of experience doing what they do.

When we want to upgrade the audio system in a vehicle with a center channel, we have to reverse-engineer how that speaker is functioning. Is it a mono signal that is the sum of the left and right signals? Is it an up-mixed signal that plays sounds that are not reproduced by the left and right speakers? It could also be a little bit of both. Your installer will have to do some tests to decide what is happening and how to deal with it.

Do We Undo or Up-do?

OEM IntegrationIf you have a vehicle with a genuine up-mixed center channel, one of the best ways to upgrade the audio system is to leave the processing alone and add better speakers, amplifiers and signal processing. With this method, we can create a sound system that sounds amazing from both the driver and passenger seats.

The basic concept is to take the left, center and right signals; recombine any frequency filtering; then send those three signals to whatever speakers you choose for each side of the vehicle and the new center channel. Often, the new system will be a three-way speaker set in the doors and maybe the A-pillars, and a two-way system in the center. We will most certainly use a digital signal processor and/or an integration processor to do the signal filtering and tuning for the new system.

How We Undo What They Do

OEM Integration
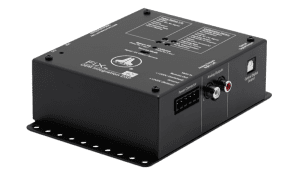
The JL Audio Fix 82 can “fix” a number of factory signal problems.

Several processors on the market can sum filtered channels together and undo factory equalization and time alignment. Some of these processors require manual adjustments and some work automatically with a custom setup track. After using one of these processors to provide a full bandwidth signal, we can then use digital signal processing to set up the new system and compensate for the vehicle acoustics. Just as the vehicle manufacturer chose to equalize the signal going to each speaker, we need to do this to maximize the performance of your new system.

What if We Don’t Undo What They Did?

Imagine a simple scenario: You have a car, perhaps a Nissan Altima. Even the base model audio system has equalization in this vehicle. Equalization is based on the speaker that is being used, location of the speaker and acoustic effects of the vehicle on the signal from that speaker relative to the listening position. If we change the speaker to one that is better, the factory equalization can – and most likely will – work against us. That nice new speaker may sound worse than the cheap factory speaker. After all, the manufacturer tried to make what was likely a low-quality speaker sound OK.

Trust Your Local OEM Integration Experts

When it comes time to upgrade the audio system in a fairly new vehicle, make sure you are working with a mobile electronics retailer that knows how to evaluate the existing audio system properly. If you are changing the source unit, then it’s no big deal. But if you are using the factory radio and/or amplifier, proper testing is crucial. Don’t be scared or discouraged. A well-trained retailer can transform any audio system into something truly amazing! Drop in and see what they can do for you.
This article is written and produced by the team at www.BestCarAudio.com. Reproduction or use of any kind is prohibited without the express written permission of 1sixty8 media.
Filed Under: ARTICLES, Car Audio, Integration, RESOURCE LIBRARY

  • 1
  • 2
  • Next Page »

Contact Us

Copyright © 2023 | Site design by award-winning creative agency D'zine Alaska , with site support by 1sixty8 Media and Modern Media Geeks.